Updated on: September 16, 2024
Short on time? Here’s how to remove viruses from Chromebooks:
- Scan Device. Run a full scan with a quality antivirus like Norton.
- Follow the Antivirus’s Recommendations. Once the scan is complete, you’ll be presented with instructions to improve your device’s security.
- Remove Suspicious Apps and Extensions. Check your Chromebook for any suspicious apps and extensions, then remove them.
- Reset Your Browser’s Settings. Restore your browser to its default settings to close any remaining vulnerabilities.
- Stay Protected. Shield your Chromebook against future threats by keeping your new antivirus app turned on. This will protect you from dangerous apps and viruses going forward.
A quality antivirus can help remove any threat, including viruses, from your Chromebook. While Chromebooks rarely get viruses thanks to their unique configuration, there are still threats that can slip past the defenses built into ChromeOS. That’s why I always recommend an antivirus.
Chromebooks are still susceptible to a number of crippling cyber threats. These include phishing pages that can steal your information, malicious apps that can bog down your system, and extensions that can log your every keystroke. Even if viruses aren’t a huge threat to Chromebook hardware, malware still poses a tremendous threat to Chromebook users and their personal information.
Luckily, there are a number of antiviruses that provide essential protection for Chromebooks. I tested every top antivirus app on my Chromebook to find the best. I found that most weren’t powerful enough to remove complex viruses from a Chromebook, but others worked quite well.
I narrowed it down to several good options but Norton is easily my favorite. On top of a flawless application scanner, it has a well-rounded set of extra features like a VPN and web protections. Since it comes with a risk-free 60-day money-back guarantee, you can test it and ensure it works for you.
Step 1. Identify Any Vulnerabilities and Malicious Apps on Your Chromebook With an Antivirus
Never connect your cell phones, USB drives, or tablets to an infected Chromebook. This allows the virus to spread across multiple devices, potentially afflicting your entire network over time.
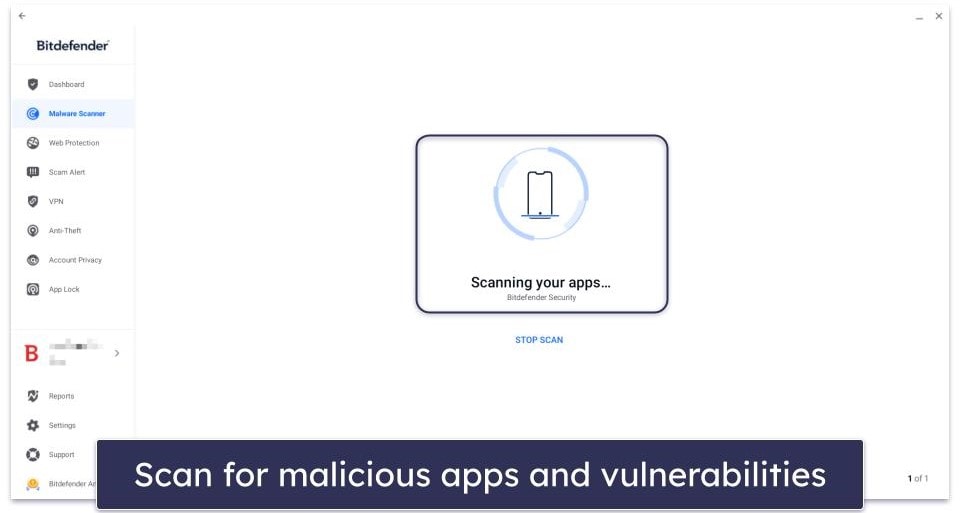
Start by downloading a good antivirus app from the Google Play Store (like Norton or Bitdefender Mobile Security). Since trying to deal with a virus by yourself can result in the problem getting much worse, all you’ll have to do is install the antivirus app and get ready to run a full system scan. You’ll need to grant the app certain permissions, but the antivirus should walk you through this process.

A full scan will thoroughly check your device for vulnerabilities like malicious apps or Wi-Fi connections. Sometimes these slip through your built-in antivirus. Malicious apps are the number one threat to Chrome users, so having a standalone antivirus for Chromebook helps detect threats that your Chromebook couldn’t find on its own.
A full scan will normally take less than 10 minutes but be prepared to wait longer. I recommend you leave your computer alone until it’s finished. Once it’s done, you’ll be given a report of any shady apps and other vulnerabilities it’s detected.
You can now proceed to Step 2.
Step 2. Remove the Malicious Apps and Follow Your Antivirus’s Recommendations
Now, your antivirus will show you a list of any suspicious applications it’s caught and give you a few options for dealing with them. I recommend most users trust their antivirus and remove anything that’s been flagged. Advanced users may wish to make sure that no safe apps were falsely flagged, in which case you can review each item that your antivirus tagged as a threat and keep the ones you want.
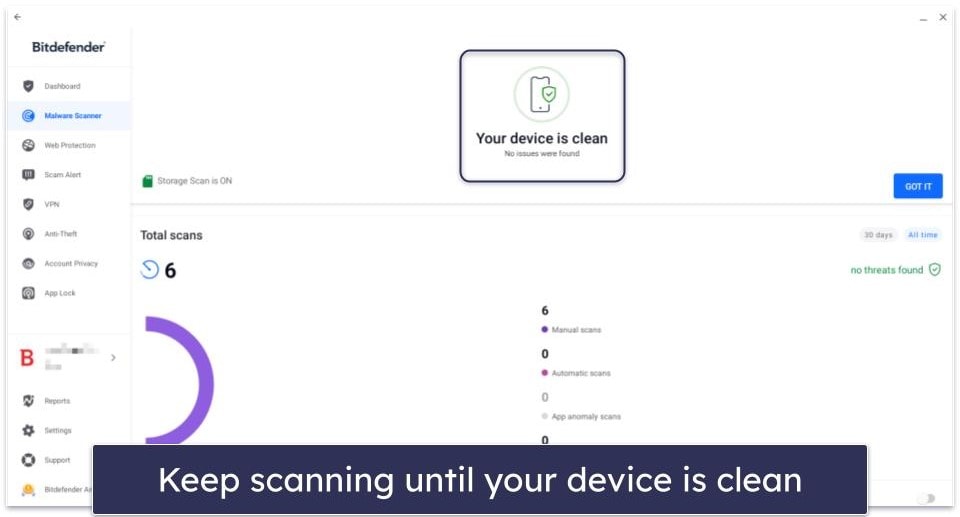
After removing the threat, you should restart your Chromebook. Once that’s done, just run another full scan to fully make sure every suspicious app is gone. Ideally, this scan will be a lot faster on the second try. Antiviruses like Norton analyze your disk much faster on subsequent scans.
Just like last time, wait for the scan to complete. If it finds another suspicious app, simply repeat this step. If nothing is flagged, congratulations, you’ve defeated all of the malware on your device!

That doesn’t mean you can uninstall your antivirus, though — without an antivirus, your Chromebook is exposed to thousands of malicious apps, fraudulent websites, and crafty phishing scams. While most antiviruses on Chromebooks are limited compared to their Android counterparts, they still heavily improve your native Chromebook security.
Make sure you keep your antivirus, just in case. Go ahead and enable your real-time protection as well, to make sure your device is protected in the future.
Step 3. Remove Suspicious Extensions and Apps from your Chromebook
If it wasn’t a malicious app, the most likely source of the virus on your Chromebook was a suspicious browser extension. Even if you’ve removed the virus app infecting your device, you should manually uninstall suspicious extensions, just to make sure the problem doesn’t come back.
Fortunately, removing a suspicious browser extension is quite simple. Follow the below steps if you’re using the default Chrome browser, and it shouldn’t take longer than a minute. Alternatively, you can jump to our Firefox steps if you’re using the Mozilla Firefox app.
Google Chrome
- Open Chrome and select the 3 vertical dots on the top right.

- Click Extensions, then Manage Extensions.

- Look for suspicious extensions. Click Details to check the extension’s permissions.

- Choose the extension you want to get rid of and click Remove. Click Remove again to confirm your choice.Uninstall suspicious apps from your Chromebook.

- Uninstall suspicious apps from your Chromebook.
Mozilla Firefox
- Open the Mozilla Firefox app on your Chromebook and click the puzzle icon in the top right corner.

- Choose Extensions from the menu on the left.

- Click on the add-on you don’t trust.

- Click on the 3 dots and select Remove from the menu that appears.

- You’re now ready to remove suspicious apps from your Chromebook.
Uninstall Suspicious Apps from your Chromebook
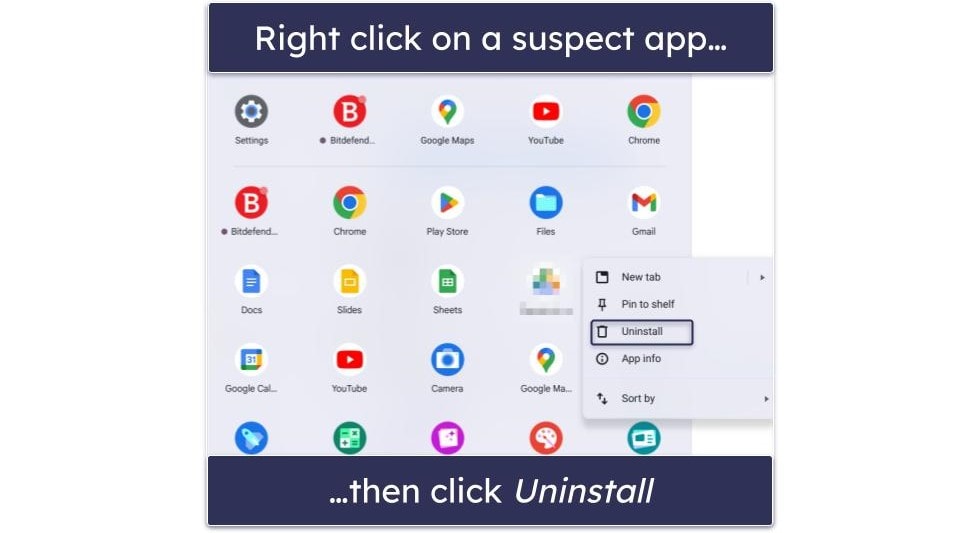
Sometimes the culprit can be a seemingly normal app that you installed onto your Chromebook. To get rid of a suspicious app, all you have to do is:
- Open the Chromebook launcher on the bottom left of the screen.

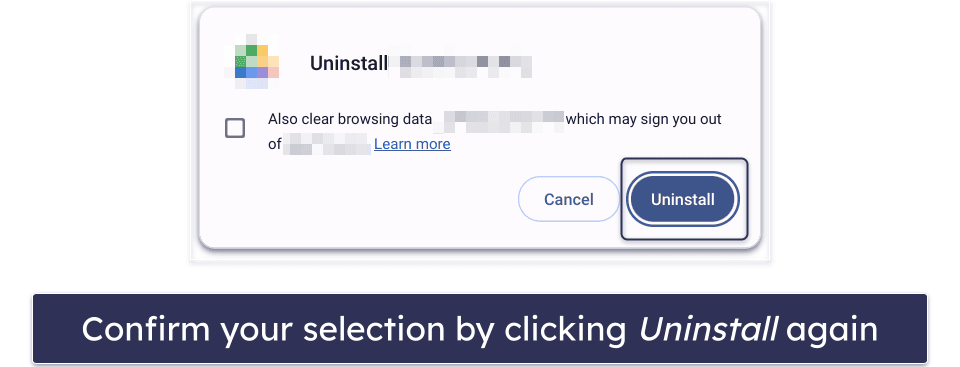
- Right-click any app you don’t recognize or find suspicious. You can also double tap the mouse pad. Choose Uninstall or Remove from Chrome (depending on your Chromebook version).

- Confirm by clicking on Uninstall.

Step 4. Restore Your Browser to Default Settings
Even after you’ve removed the offending apps and browser extensions, it’s a good idea to restore whatever browser you use to its recommended settings. This will protect you in a few small ways that even a premium ChromeOS antivirus can’t. I’ll start with a guide showing Chrome browser users what to do, but if you use Firefox, you can jump ahead.
Google Chrome
- Open Chrome, click on the 3 dots in the top-right corner of the window, and select Settings. In the Settings page that opens, select Reset settings from the menu on the left side.

- This will open up a page with one option: Restore settings to their original defaults. You’ll need to confirm your choice by clicking Reset settings in the smaller window that pops up.

- You’re now ready to keep your device protected.
Mozilla Firefox
- Open Mozilla Firefox and click on the 3 horizontal lines in the top-right corner of the window. From the menu, choose Help then More troubleshooting information.

- On the page that opens, click Refresh Firefox… and then confirm your choice to restore Firefox to its default settings. All that’s left now is to keep your device protected.

- Firefox will now uninstall. To reinstall the app, go to the Play Store, search for “Firefox” and click Install on the store page. Make sure it’s the correct app and not a scam by confirming that the developer is listed as Mozilla.

- Firefox will now reinstall with it’s default settings. All that’s left now is to kee your device protected.
Step 5. Keep Your Device Protected
Even if it’s harder to get a virus on a Chromebook than it is on Windows, you still need an antivirus for Chromebook to protect yourself. So make sure to follow these steps, they’re simple, but require some level of vigilance. Remember that the best technology in the world is still prone to a user making a careless mistake.
- Keep Your Chromebook’s OS and Apps Up to Date: Make sure you always update your Chromebook when prompted to do so. Google issues regular security patches to protect you from the latest malware and exploits. The same is true for any apps you might have installed. Keep them updated or you’ll be at risk.
- Don’t Download Suspicious Files: Be careful when downloading extensions or apps, as hackers often hide malicious software in seemingly harmless files. Duplicitous apps can occasionally slip past the Android App Store’s security, so use an antivirus like Norton to double-check every app you install. Make sure it’s from the official developers. Red flags are misspellings in the app’s description, low download or review count, and a lack of realistic-looking reviews.
- Secure Your Wireless Network and Devices: While it can sound overwhelming to protect your network and every device on it, there are a few simple tools you can use that handle the job. Use a password manager to set a strong Wi-Fi password, install a quality VPN to encrypt your data and secure your privacy, and use identity monitoring tools to ensure none of your information is floating around disreputable forums.
- Download a Secure Antivirus Program: Any good antivirus will scan your apps for threats, alerting you when it finds potential malware. The best antiviruses (Norton) come with every feature you’d need to protect yourself online, including a password manager, Wi-Fi protection, and more. While Norton is my favorite, there are plenty of great antiviruses that are worth your money.
- Use Your Antivirus’s Secure Browser Extension: An effective web protection tool is one of the most important ways you can protect your Chromebook. Some ChromeOS antiviruses will guide you through this process directly from within the app. In most cases though, you’ll need to go to the Chrome browser’s web store and find an extension to protect you from web-based dangers. Make sure the extension is legit by looking at the reviews, the number of downloads, and the developer’s information.
- Route Your Connection Through a VPN: Using a VPN will hide your web traffic from criminals, snooping corporations, and governments, effectively shielding you from a range of threats. Make sure to pick the right provider as many VPNs don’t work on Chromebooks. VPNs provide a huge boost to privacy and many provide useful extras, like ad blockers.
- Invest in a Password Manager: A good password manager will generate secure passwords for your accounts and encrypt them using 256-bit AES or similar. This is excellent for your device security as it’ll prevent hackers from using techniques like brute forcing to hack into accounts with simple passwords. The best password managers on the market come with several other advantages, too, including the ability to generate 2FA codes, check for account beaches on the dark web, and more.
3 Best Antivirus Programs for Removing Viruses on Chromebook
Quick summary of the best antiviruses for getting rid of viruses on Chromebook:
- 🥇 1. Norton — Best antivirus suite for protecting your Chromebook from viruses.
- 🥈 2. Bitdefender — Best for lightweight cloud-based app detection on Chromebook.
- 🥉 3. TotalAV — Beginner-friendly Chromebook antivirus + reliable app scanner.
How to Tell If Your Chromebook Has a Virus
It’s important to catch a virus as early on as possible. Not only do they tend to spread, but they can slowly destroy your whole Chromebook if left alone. Luckily, it’s easy to tell if you have a virus. You may have a virus if:
- You have suspicious browser extensions and apps. The telltale sign that you have a virus is when you also see a suspicious or unexpected browser extension or app on your Chromebook. Immediately uninstall these and run a full scan of your device.
- Your Chromebook is suddenly performing poorly. If it suddenly takes a long time to open normal apps, your Chromebook seems to overheat constantly, or your Chromebook’s general performance is terrible, chances are you have a virus.
- Apps behave strangely. Sometimes your Chromebook’s performance may be fine, but apps start crashing or behaving strangely. If you start noticing irregularities in your apps, it’s time to run a full scan.
- Your homepage has changed. If your homepage has suddenly changed on Chrome, chances are you have some type of virus. You mustn’t click on any links or pop-ups on your new home page, as these are likely malicious.
- You’re getting bombarded by pop-ups, ads, and redirects. It’s normal to get a few pop-ups and ads here and there, but if you can’t open a page without something going wrong, you most likely have malware. These pop-ups typically ramp up in severity over time. Never click on these malicious pop-ups, ads, or redirects.
- Your device or network have unexplained spikes in activity. If your battery is draining at an irregular pace, unrelated to any intensive activity on your part, or if you look at your network activity and see huge increases in data uses that aren’t easily explained, your Chromebook may be harboring malware.
How to Factory Reset Your Chromebook
Sometimes a virus has dealt so much damage to your Chromebook that your only option is to fully reset it. Performing a factory reset is simply enough but should be seen as a last-ditch effort.
To reset your Chromebook:
- Sign out of your account on Chromebook.
- Hold Ctrl + Alt + Shift + R until you get a pop-up.
- Select Restart, then Powerwash, and finally Continue.
- The reset process will begin, it will take a minute. Once it’s complete, sign back in with your account information and follow the on-screen prompts to set it up.
Frequently Asked Questions
Are free antiviruses good enough to get rid of viruses on Chromebooks?
The plain answer is no.
The wordy answer is that free antivirus apps on Chromebooks usually lack the power to detect dangerous apps. A free antivirus app may happen to catch your virus, but it’s a gamble. You’re always better off with an investment in a good premium antivirus (like Norton) that can both reliably destroy any virus on your Chromebook and keep it safe in the future.
How do I get viruses on a Chromebook?
The main way you get a virus on Chromebooks is through malicious browser extensions. Without real-time protection and reliable browser protection, you can install virus-riddled extensions without even realizing it. You can also get a virus through an app, but that’s typically less common on a Chromebook.
However, if it got there, you’ll want to get rid of any malware on your Chromebook. Remove the suspicious browser extension, install a quality antivirus suite (hint, Norton), and run a full scan of your Chromebook. If your antivirus flags a dangerous app or extension, you can safely remove it.
Can Chromebooks use antiviruses?
Yes! Newer Chromebooks can download apps from the Google Play Store just like a phone or a tablet. While in the past, Chromebook users couldn’t download an antivirus suite, now it’s as simple as opening up the Play Store and installing the one you want.
The only thing that’s worth noting — you’ll be using the mobile versions of the antivirus suites, rather than the desktop counterparts. What’s more, because ChromeOS is not the same as Android, some features won’t work on Chromebooks. Luckily, the core security features of every antivirus on this list worked on my Lenovo Chromebook.
How do I recognize a malicious Chromebook extension?
There are a few tell-tale signs that your Chromebook extension is malicious. A few of the more obvious signs are that your homepage has changed, your device is suddenly running slowly after installing the extension, or you’re being bombarded by pop-ups and ads.
There are other subtle hints you should always look out for. Make sure you can verify the authenticity of the developer, look for misspellings or grammatical mistakes in the description, and keep an eye on scammers impersonating legitimate companies.