
Updated on: September 21, 2024
Short on time? Here’s how to cancel your Surfshark subscription and get a refund in 2024:
- 1. Cancel your Surfshark subscription. All you have to do is contact Surfshark live chat or email support and tell them you want to cancel. When I tested the process, my refund was approved instantly, no questions asked, even though I bought its cheapest plan for testing.
- 2. Uninstall Surfshark. This is really easy to do if you follow our step-by-step instructions below to remove all Surfshark files from your device.
- 3. Try an alternative VPN. Even if Surfshark isn’t for you, I advise continuing to use a VPN to protect your privacy. ExpressVPN is a great alternative because it’s super user-friendly, has very strong security, and provides the best overall performance.
Surfshark is one of the best VPNs on the market, but I understand that it might be missing some things that are important to you. For example, you might value full leak protection or require fast speeds when using distant servers. Luckily, you can cancel your Surfshark subscription and get a refund in just a few steps.
The VPN has a 30-day money-back guarantee on all plans, so you’ll be able to get a full refund if you’ve been subscribed for less than 30 days. Surfshark processes refunds quickly so you should see the money back in your account within 7–10 business days.
After you cancel your subscription, your online activity will no longer be protected. So, it’s a good idea to choose an alternative VPN. ExpressVPN is my top Surfshark alternative, as it has the fastest speeds on the market, comes with feature-rich apps, and has a vast server network. Editors' Note: ExpressVPN and this site are in the same ownership group.
TRY EXPRESSVPN (30 Days Risk-Free)
How to Cancel Your Surfshark Subscription (Step-by-Step Guide)
Windows or Mac
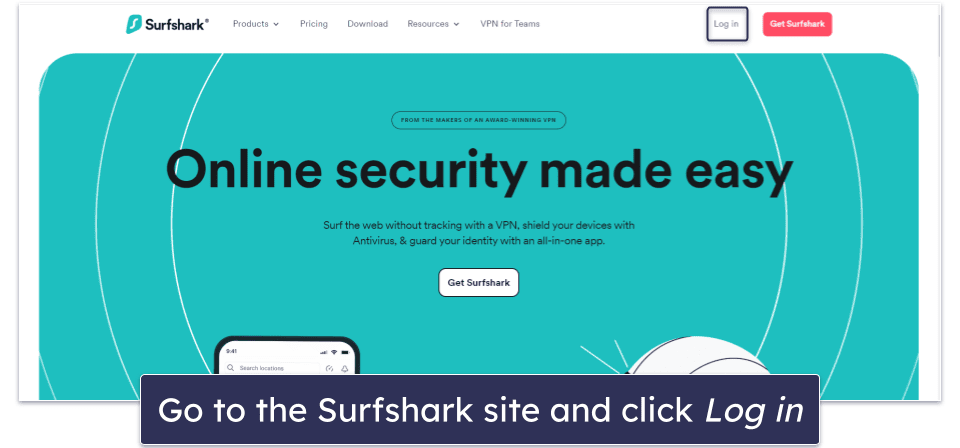
- Go to Surfshark.com and click Log in (on the top right of the page).
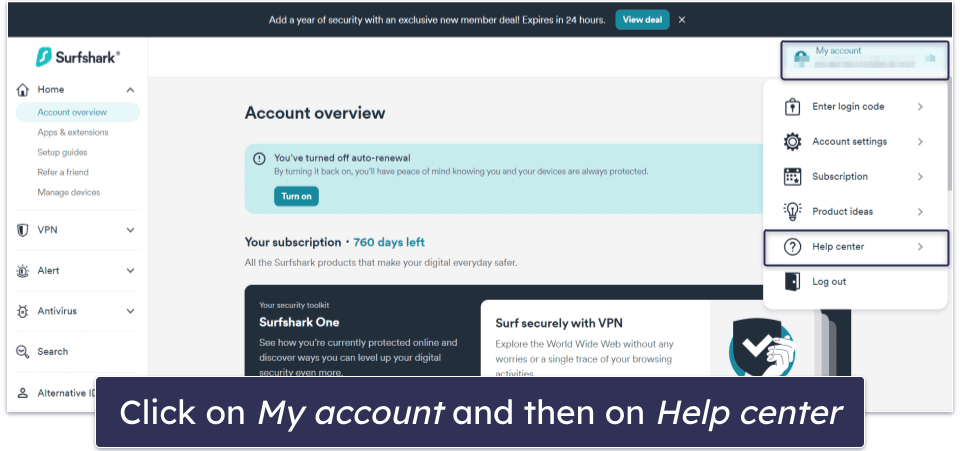
- Click on My account in the top right corner and then on Help center.
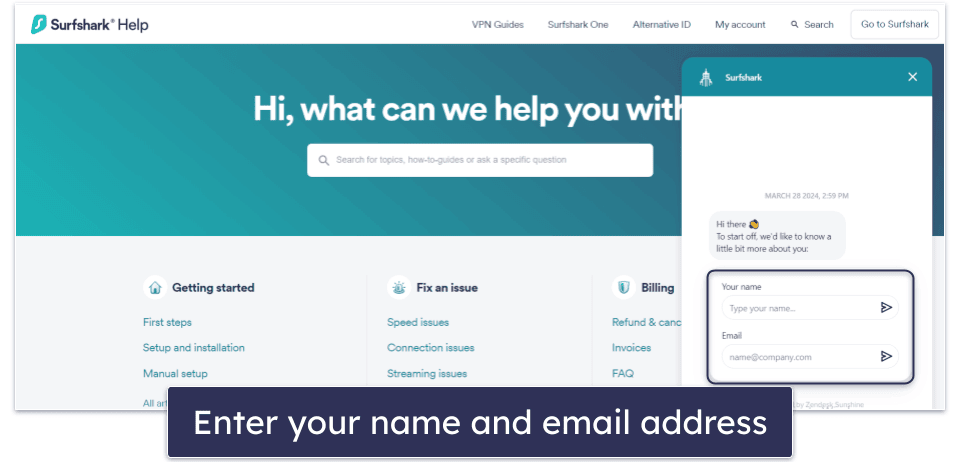
- Scroll to the bottom of the page and click on the Chat with us button. This will open up Surfshark’s automated chatbot.

- Enter your name and email address.
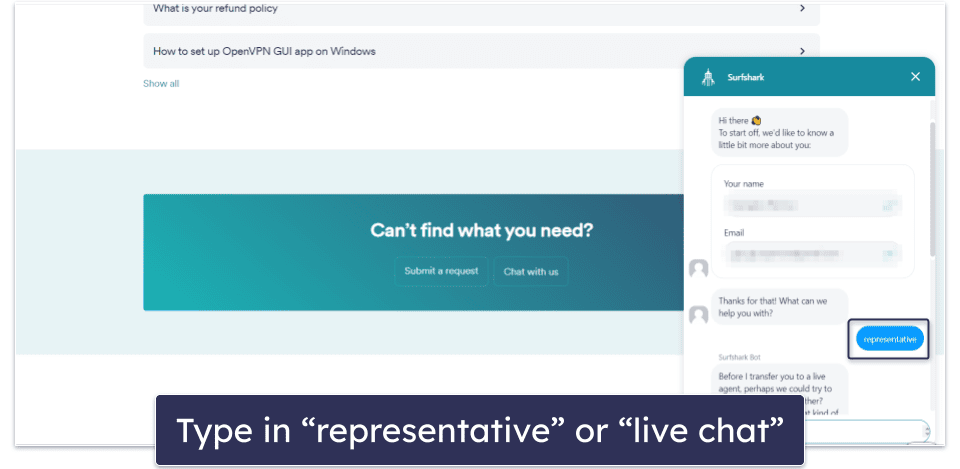
- Start the live chat by typing in “representative” or “live chat” in the chat box.
- You’ll be connected to a representative shortly. Let the representative know that you would like to cancel your auto-renewal. They’ll send you a link where you can turn it off.
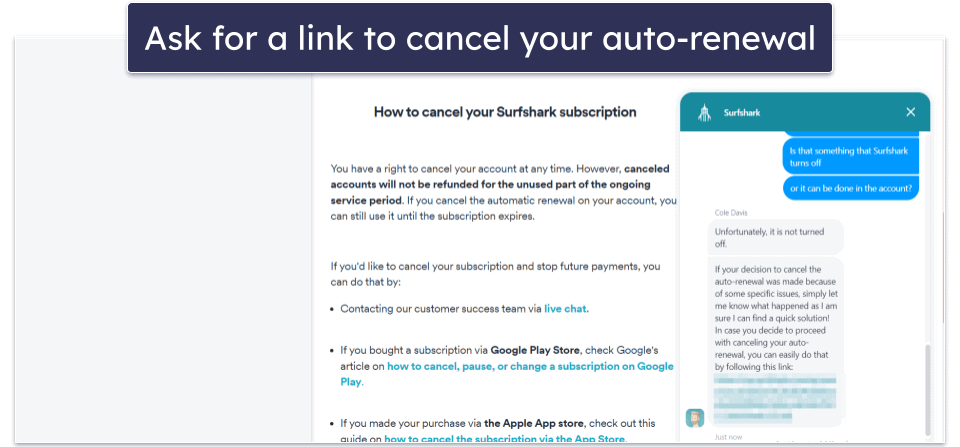
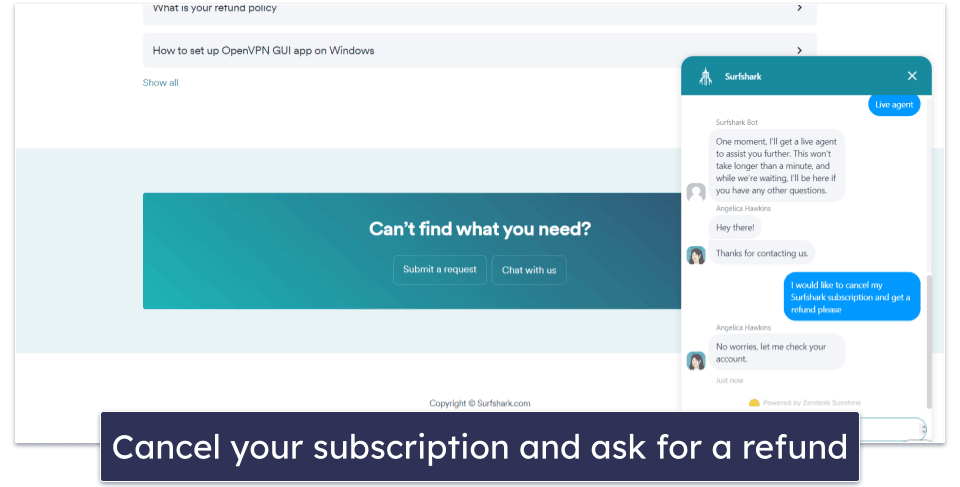
- Next, ask them to cancel your subscription and they’ll ask you for a reason. They informed me that I’ll get a confirmation email in 12 hours and receive my refund in 7–10 business days.
- Pick an alternative VPN. ExpressVPN is the best VPN on the market. It has super-fast speeds for all online activities, comes with top-notch security features, and has user-friendly apps.
iPhone or iPad
If you’ve purchased a Surfshark subscription online, you can follow the method above to cancel your Surfshark subscription from your iOS device. If you’ve made your purchase through the Apple App Store, make sure to follow the steps outlined below:
- Launch the Settings app.
- Tap your name and then choose Subscriptions.
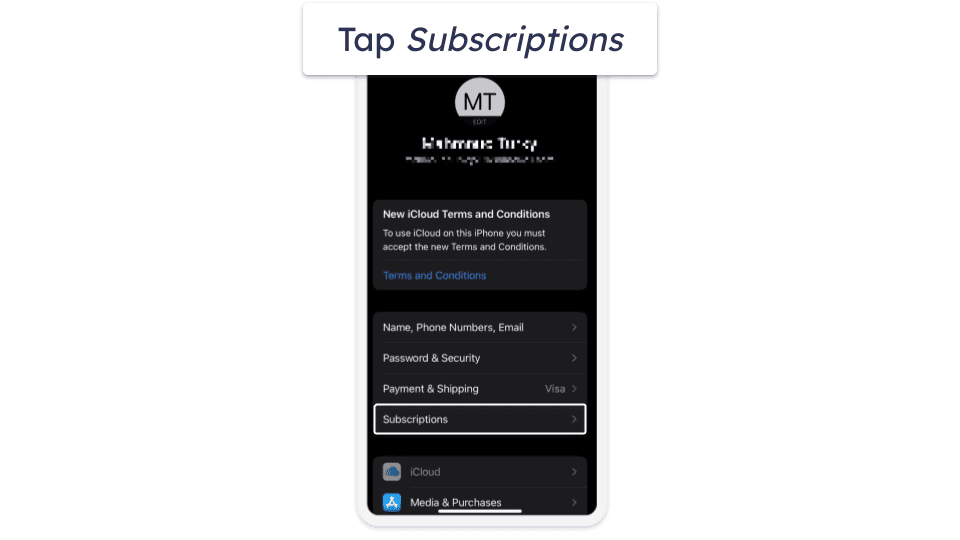
- Locate the Surfshark app and tap Cancel Subscription.
- Navigate to reportaproblem.apple.com to get your refund.
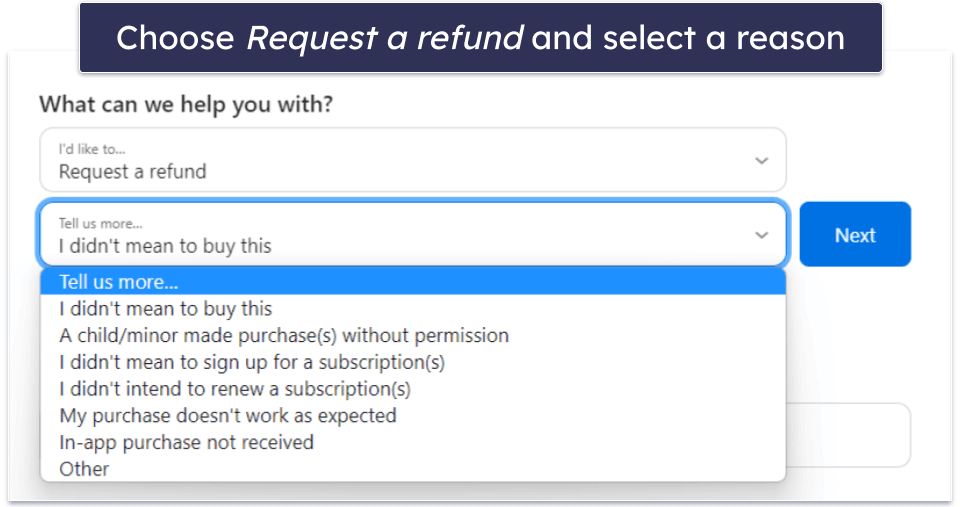
- Use your Apple ID to log in. Next, under the “What can we help you with” section, tap on Request a refund.
- Pick the reason why you need a refund in the second drop-down list.
- Opt for an alternative VPN for your iOS device. ExpressVPN has one of the best iOS apps on the market. Plus, it has industry-leading security features, fast speeds, and an intuitive interface.
Android Smartphone or Tablet
If you bought your Surfshark subscription online, you can use the Windows/Mac computer guidelines provided above. However, if you subscribed via the Google Play Store and it’s within 48 hours of your initial subscription, you should follow these instructions. If it’s been more than 48 hours, make sure to follow the desktop instructions.
- Launch the Google Play Store app.
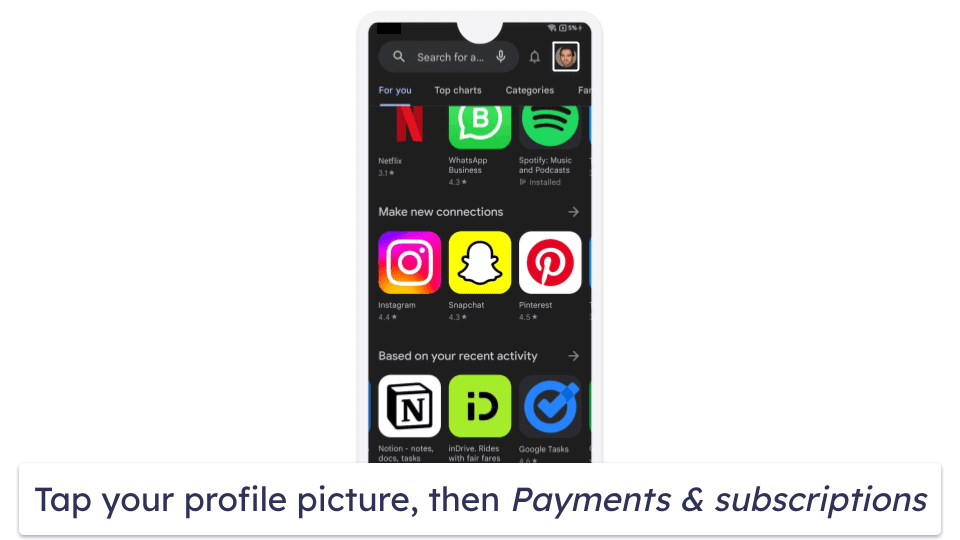
- Tap your profile icon located in the top right. Then, choose Payments & subscriptions.
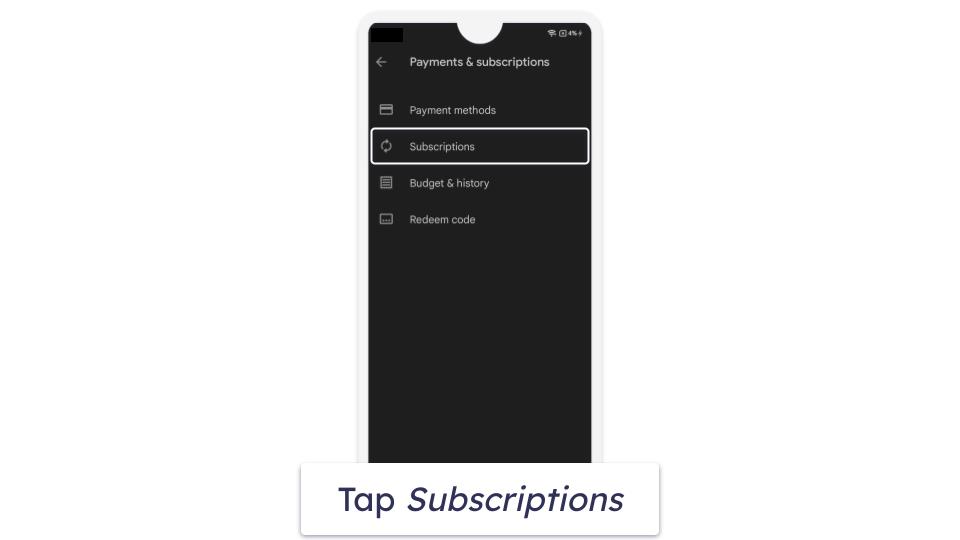
- Tap Subscriptions and locate Surfshark on the list. Next, tap Cancel Subscription.
- Go to payments.google.com and sign in with the same login credentials you you used to purchase the VPN.
- Under the Activity tab, tap the Google Play Apps link with Surfshark in the description.
- Go to the bottom of the ticket and tap Contact Google LLC.
- Next, you’ll need to tap Refunds & returns and then on Learn about refunds on Google Play.
- Ensure that you meet Google’s refund criteria, then tap Request a refund.
- Submit your request to Google. Typically, it’ll take 1 day for Google to inform you of its decision.
- Go for an alternative VPN for your Android device. ExpressVPN is my top Android VPN because it has an intuitive Android app, great security features, and excellent streaming and torrenting support.
Best Surfshark Alternatives
Quick summary of the best Surfshark alternatives in 2024:
- 🥇 1. ExpressVPN — Best alternative to Surfshark (fast speeds and top-notch security).
- 🥈 2. Private Internet Access — Secure alternative to Surfshark (with customizable apps).
- 🥉 3. CyberGhost VPN — Great Surfshark alternative with dedicated streaming servers.
Editors' Note: Intego, Private Internet Access, CyberGhost and ExpressVPN are owned by Kape Technologies, our parent company
How to Uninstall & Fully Remove Surfshark Files From Your Devices
Windows PC or Laptop
Windows 11
- Click on the Start icon, located at the bottom of your screen.

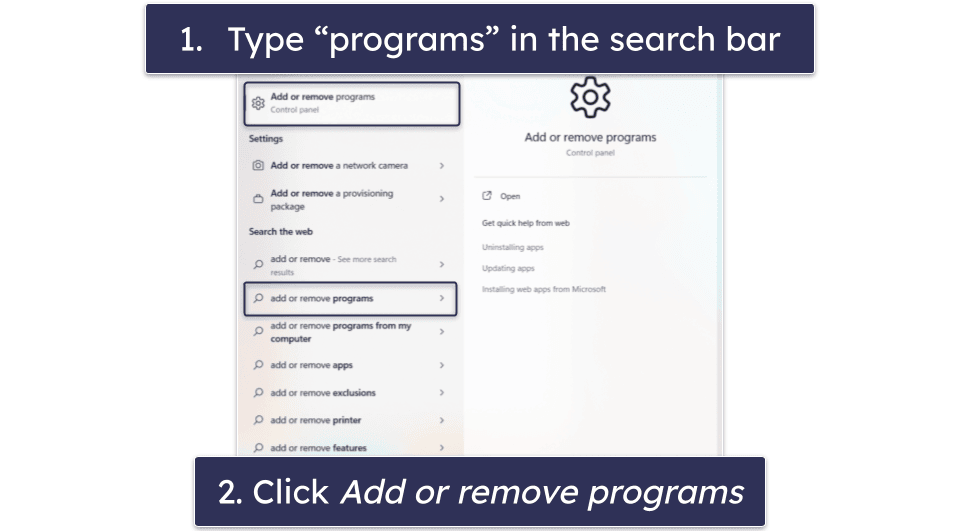
- In the search field at the top of the Start menu, type “programs”.
- Click on Add or remove programs on the list of installed programs.
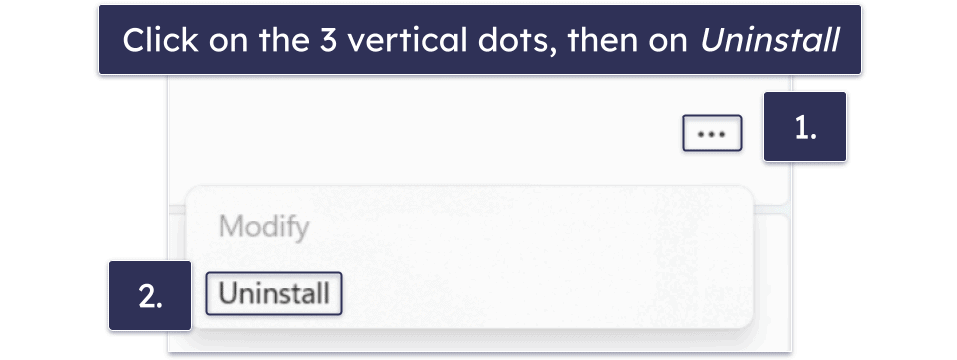
- Locate the Surfshark app on the App list. Click on the 3 horizontal dots beside Surfshark, and then click Uninstall.
- Make sure to follow the Surfshark’s uninstallation wizard. Once the process is completed, the Surfshark app will be removed from your Windows 11 PC.
Windows 10
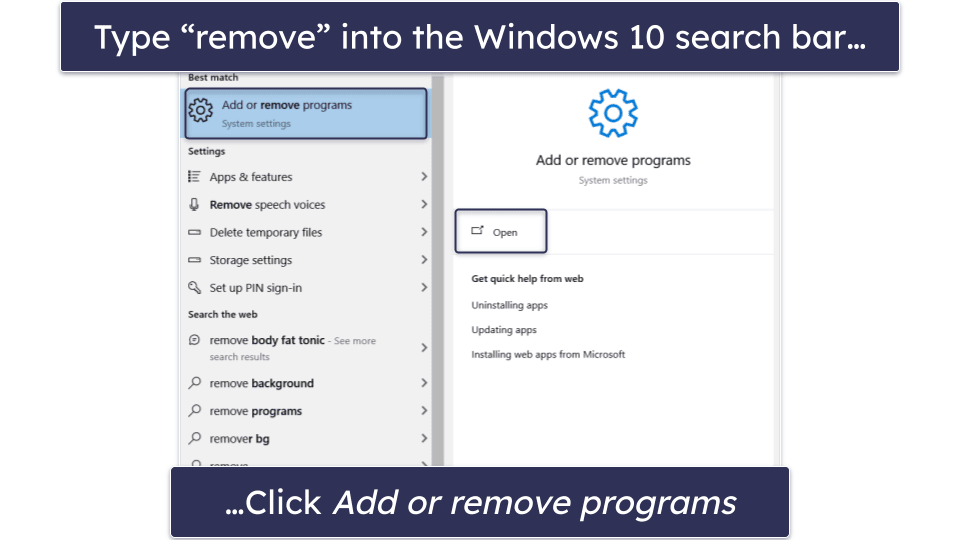
- Type “remove” into the search bar, which is next to the Windows Start button. Next, click on Add or remove programs.
- Find Surfshark on your list of installed apps. Click on it and then click Uninstall twice.
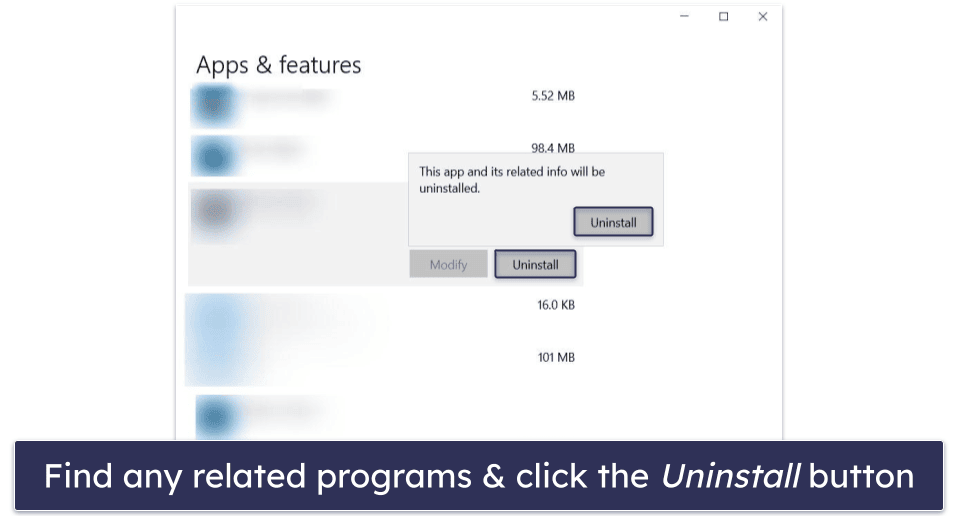
- Follow the Surfshark’s uninstallation wizard. After the process is finished, you’ll have removed all Surfshark files on your Windows 10 PC.
Mac Computer or Laptop
- Click Finder on your Mac’s dock.
- Click Applications.
- Find Surfshark on your list of installed apps. Drag and drop it into the Trash.

- Right-click the Trash icon, then click Empty Trash.
iPhone or iPad
- Tap on the Surfshark app and hold on it until the Remove App button appears.
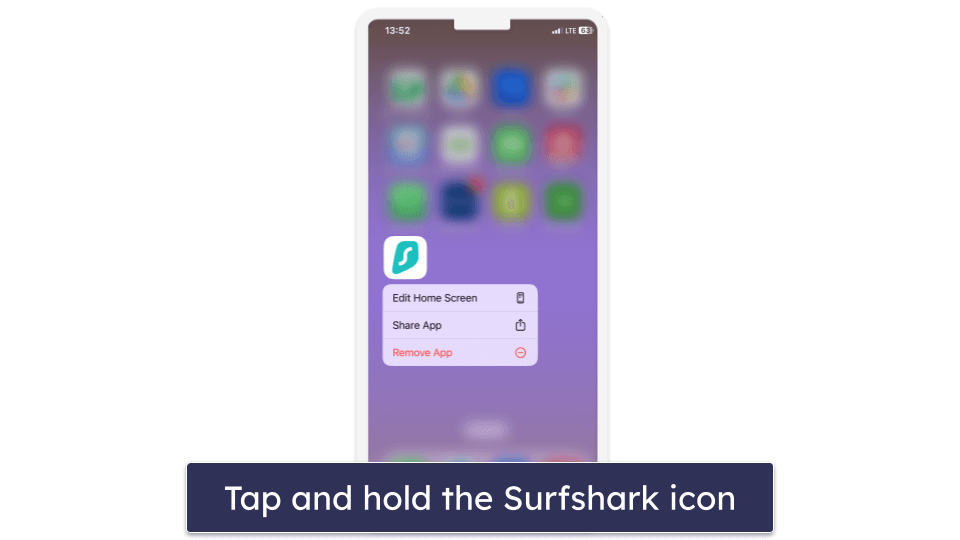
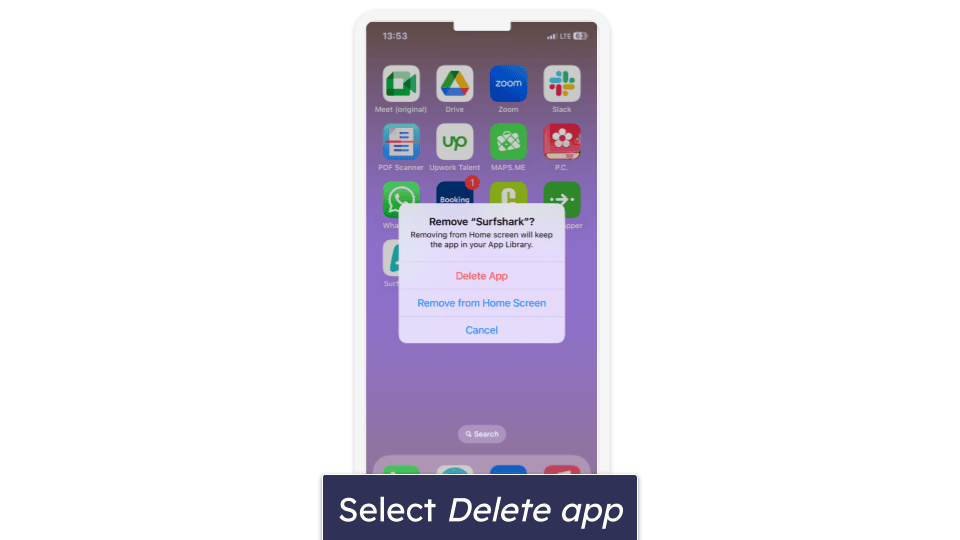
- Tap Remove App, and then tap Delete. Now you’ve uninstalled Surfshark from your iPhone or iPad.
Android Smartphone or Tablet
- Find the Surfshark app on your Android device. Hold on it until a menu appears.
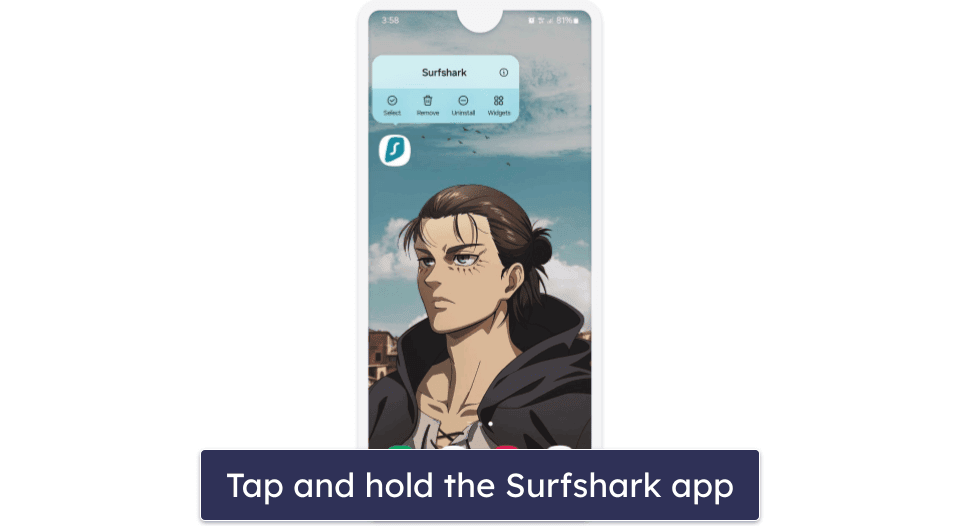
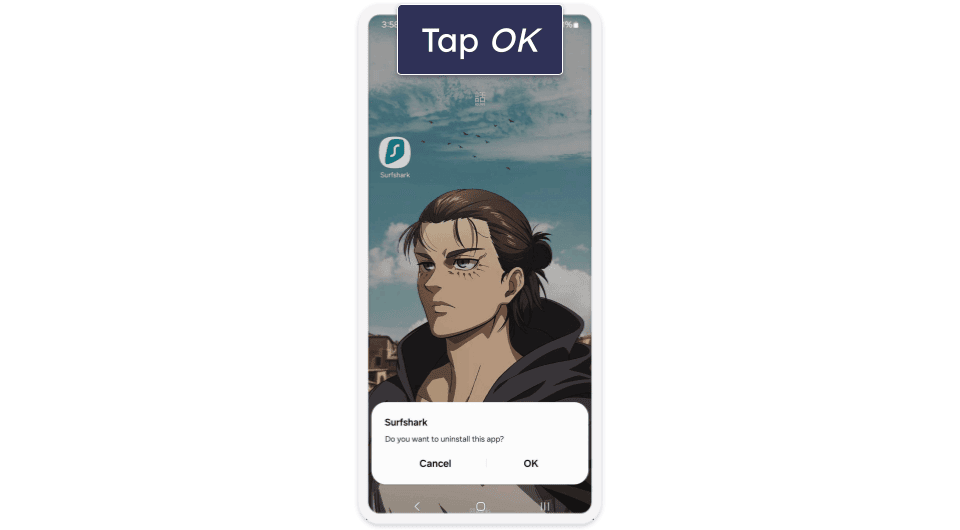
- Tap Uninstall and then confirm your choice by tapping OK. Now, Surfshark has been uninstalled from your Android device.
Frequently Asked Questions
Does Surfshark have a 30-day money-back guarantee?
Yes, Surfshark has a 30-day money-back guarantee on all of its plans, so you can try it risk-free. If it doesn’t meet your needs, you can cancel your subscription and request a refund via Surfshark’s live chat. You’ll receive your refund in 7–10 business days. You can read more about Surfshark’s plans and pricing in our full review.
How do I cancel my Surfshark subscription?
Make sure to follow our step-by-step guides on how to cancel your Surfshark subscription and get a refund on any device. The whole process is very simple and it only takes 10 minutes. Once you’ve uninstalled Surfshark, make sure to get a new VPN to protect your privacy.
How long does Surfshark refund take?
Once your Surfshark subscription has been canceled, it might take 7–10 business days to get your refund processed. You’re only eligible for a refund if you cancel your Surfshark subscription within the first 30 days.
How do I stop auto-renewal on Surfshark?
You can disable auto-renewal with the following steps. You’ll still have access to Surfshark until your subscription expires, and you won’t be charged for a new cycle. To get a refund, you must make a request within the first 30 days of your subscription.